February 26, 2007
Blog Candy Time!
ETA: The winner is JEN! Here's her comment: "something crazy about me.....I played Rugby in college :o) Short lived but I loved it. my partner in VSN crime, dawnmercedes referred me...so give her an extra entry OK!"
Congratulations Jen, send me your mailing address and your package will be on it's way tomorrow morning!
There has to be something wonderful about Monday's, right? So here it is! Blog Candy!
I am offering up to one lucky reader a multitude of goodies. An alterable "band-aid" type tin, three wood mounted rubber stamps, a brand new mica magic ink pad in purple, two lenghts of purple ric-rac, one large size in soft chenille lavender and one small size in royal purple, and a handful of purple prima flowers. Does anyone else detect a color theme here? *grin*
Here's what you have to do to get your name in the drawing:
1. Subscribe to this blog. Just enter your email address in the little area to the right and hit subscribe. You'll receive an email each time I update and won't have to visit constantly to see! (If you are already subscribed, skip this).
2. Leave a message on this post telling me ONE crazy fact about yourself!
3. Tell your friends about the giveaway and have them leave a comment here too. For each friend who mentions your name, you'll receive an extra entry in the giveaway!
Giveaway ends Friday at 9AM EST. I will draw a winner from the list of names and hopefully that person will know by Friday evening and I can mail their package out on Saturday!
GOOD LUCK.
February 23, 2007
Cards, cards, and more cards
My dependence on the Internet frightens me sometimes! While the server here was having a meltdown I was having a personal one. Not being able to post to this blog was driving me batty! So, I figured some creative time in my studio would do no harm. Here's what I came up with.
A simple card, really. A piece of ivory CS folded to make a 5x5 card base. I distressed the edges to give a bit of texture, embossed a BG of script, and made up a focal image on 3 glass slides. I stamped the face with black StazOn, let it dry, turned the slides over and applied alcohol inks to the back, let them dry, and then using double stick tape, adhered them to the card with the stamped image facing out. I added some sheer gold organdy ribbon to embellish.
The second card I whipped up rather quickly. I stamped a bunch of flower images on black CS using white chalk ink, cut it to fit the bottom of the card base, added a piece of ribbon and had the main card done. For the central image I stamped some of the same flower images in black on a sheet of labels, matted it with black and then white, stamped a sentiment on it and adhered it to the card front. I didn't like how the top of the piece disappeared into the white card top, so I matted only the top portion in black again to make it stand out.
The card opens in a strange way, so I used a photo corner to hold the card closed. I like the touches of red with the black and white. The whole time I was making this card I kept singing (out loud, mind you) that early 90s song "I've been thinking about you" by London Beat. Anyone remember that song? It totally evokes feelings of Jr. High School dances with me. So because I couldn't get it out of my head, I looked through my sentiment stamps and found the perfect one! *grin*
SUPPLIES: SU ivory CS, Face image stamp by Sunday Int., script BG stamp by Purple Onion Designs, EP by Sparkle N Sprinkle, StazOn black ink, Versamark ink, Adirondack alcohol inks (Pesto, latte, Stream, raisin, caramel), Offray ribbon.
The second card I whipped up rather quickly. I stamped a bunch of flower images on black CS using white chalk ink, cut it to fit the bottom of the card base, added a piece of ribbon and had the main card done. For the central image I stamped some of the same flower images in black on a sheet of labels, matted it with black and then white, stamped a sentiment on it and adhered it to the card front. I didn't like how the top of the piece disappeared into the white card top, so I matted only the top portion in black again to make it stand out.
The card opens in a strange way, so I used a photo corner to hold the card closed. I like the touches of red with the black and white. The whole time I was making this card I kept singing (out loud, mind you) that early 90s song "I've been thinking about you" by London Beat. Anyone remember that song? It totally evokes feelings of Jr. High School dances with me. So because I couldn't get it out of my head, I looked through my sentiment stamps and found the perfect one! *grin*
SUPPLIES: Flower stamps by Fontwerks, sentiment stamp by TAC. Card base by DCWV, CS by SU, Labels by Avery, ink is Archival and versamagic.
The third card I made is my favorite. I really enjoy the vintage look and used to make all my cards in that style. I generally like older, aged looking things, especially in home decorating.
Isn't that little girl adorable? I've had this stamp for almost a year and only used her twice. I like to savor the really good stamps, you know? I don't want to over-use her and get bored. This card was inspired by one I saw in The Stamper's Sampler magazine.I stamped her with brown ink on a scrap of PP and cut her out closely. I stamped the sentiments on scraps of PP and matted them with brown before adhering them to a sheet of the same PP. I then stamped the flourish image randomly on that BG, and matted it with the same PP that I stamped the girl on. I placed the girl on the entire piece, added some brads and some CS photo corners that I made and did some doodling with my white gel pen on the entire thing.
SUPPLIES: Girl and flourish images by Lost Coast Designs, "May you touch" sentiment by Eclectic Omnibus, two words (Laugh, Dream) by TAC, ampersand (&) by Purple Onion Designs. PP by K & Co., Sweetwater, Memories ink, MM brads, SU cs, Card base from Target.
February 21, 2007
Abundance
Remember this post, where I mentioned that I won some blog candy? Well I received a bountiful package in the mail this weekend from Sarah Fishburn. Not only did she send me the collaged heart pendant, but some other great things as well!A neat card that she obviously created (it has an old pic of her mom and her aunt on it!), a fun, colorful ATC, a beautiful journal made in Nepal with hand made papers, a large collaged magnet and 3 tiny collaged pins! WOW. I stuck the magnet on my filing cabinet at work and already a few people have commented on it. The best thing about the pendant is that it has two sides.
Isn't it gorgeous? My favorite color is orange so I've been wearing that side out since I got it, but tomorrow I am planning my shirt around the colors on the other side. LOL!
Thank you so much Sarah for having a blog giveaway, I'm delighted that I won!
February 18, 2007
Year of the boar
HAPPY CHINESE NEW YEAR! A year of goodwill to all.
Years:
1923, 1935, 1947, 1959, 1971, 1983, 1995, 2007
Character:
Pure of heart, Boar people are generous and kind. Full of inner strength and courage, they can take on any task. A friend who listens, the Boar is sincere and trustworthy. They are driven by their passion for life.
Years:
1923, 1935, 1947, 1959, 1971, 1983, 1995, 2007
Character:
Pure of heart, Boar people are generous and kind. Full of inner strength and courage, they can take on any task. A friend who listens, the Boar is sincere and trustworthy. They are driven by their passion for life.
February 16, 2007
Update
Just wanted all my readers to know that I haven't forgotten the blog candy promise I made. It's coming soon, so stay tuned. It will be GOOD. *wink*
Celebrate part III
Okay, here is the last and final birthday card I made for the party this weekend. This one was for my nephew's girlfriend. She's been a part of the family for many years and I consider her a good friend of mine. She's incredibly sweet and real. It's quite hard to see, but I got creative and did some fun paper piercing at the top left and bottom right corners. SUPPLIES: PP from Chloe's Closet, CS is Bazzill, Stamp from SU, Heidi Swapp fuzzy rub-on, Stickles, Offray ribbon, Zig Markers.
TECHNIQUES: White gel pen doodling over the PP, multicolor marker ink on stamp, used MM paper distressor on edges of stamped section, layering with pop dots, paper piercing.
Celebrate part II
Here is the second installment of birthday cards! This one is for my nephew. It's a joke, obviously, because the image is a sheep, not a chihuahua, but I have had this image stamp for a while and I wanted to use it on SOMETHING! I do actually have a chihuahua stamp that I normally use with that sentiment, but I thought the sheep was funnier! This card design is based loosely on one from Julie Ebersole. If you can't see the sentiment, it says, "Our chihuahua, Lupe, performed at all family functions." *knee slap*PRODUCTS: Note card base is Joann textured white CS, Image stamp from Viva LasVegas
Sentiment from Carmen's Veranda, brocade blue and whisper white CS from SU, ribbon is Offray, large square eyelets are from Joann, paper punches from Marvy, ink is Ranger archival.
TECHNIQUES: Prismacolor pencils and gamsol used to color image, paper piercing and pop dots.
Sentiment from Carmen's Veranda, brocade blue and whisper white CS from SU, ribbon is Offray, large square eyelets are from Joann, paper punches from Marvy, ink is Ranger archival.
TECHNIQUES: Prismacolor pencils and gamsol used to color image, paper piercing and pop dots.
Celebrate
We headed to a combined birthday party this weekend for my nephew, his girlfriend, and his son, my great-nephew. I made up 3 cards Thursday night and thought I'd share one per day. Here's the first. It's for my great nephew who is turning 6.PRODUCTS: "Wild about you" stamp set from SU, Marigold Morning CS from SU, orange textured CS and white CS from Bazzill, Buttons from my stash, eyelets are MM, ribbon is Offray, inks are SU and Impress, while gel pen by Sakura, pop dots from the $ tree, Marvy giga and mega scalloped punches.
TECHNIQUES: Cuttlebug embossing (using my Sizzix), DTP inking on embossed part, paper piercing, faux sewing with gel pen and hole piercing, layers raised with pop dots.
You've got mail!
I've been avoiding jumping on the Target Mailbox bandwagon, but the pull was too strong! I made this cute little number for our older foster son's teacher. The mailbox was from Target's $ spot and I just added some paper and ribbon basically.
February 15, 2007
St. Valentine's Day!
Happy belated St. Valentine's Day! We had our first snow day of the year yesterday. All 4 of us stayed home. No school, work, nor daycare! Mother Nature dropped another 2 feet on top of our previously received 18 inches.
Our older foster son wanted to know if we could have "pink milk" everyday! There's just something about color that makes it taste better? *grin*
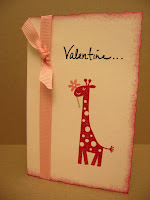
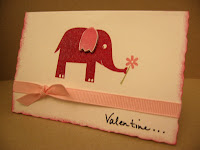
Here are the quick valentine cards I made the kids at midnight yesterday. Inside I stamped the "Wild About You!" sentiment from the SU set of the same name. That's also where the elephant, giraffe, and flower images came from. Ribbon is Offray, ink is Versacolor and Versamagic, small deckle edged notecard came from the $ tree 2 years ago.
I also placed a small tin pail of goodies on the breakfast table for each of them.
They were both delighted! The older one keep hugging me and saying "Thank you, thank you! I love you too!" It's sometimes sad to see how excited he becomes with small displays of affection...knowing he never received them before in his 7 years on earth. He sat right down after breakfast and made my husband and I an elaborate valentine using the new punches I'd bought him at Target's $ spot, some markers and lots of love. He wrote: "I will love you forever" on it. Made both my husband and I tear up.
Here's the not-so-quick card I made my husband. I found it in Papercrafts Magazine and realized it was perfect because I've had this PP for a while and have really been afraid to cut into it! You know what I mean *wink*.
I will edit this post later to include product and supply info.I made everyone pink heart-shaped pancakes for breakfast.
I generally avoid all food dyes, especially for the kids, but I figured this was a special occasion! I will say they were well received. I included heart-shaped apple slices along side, and pink soy-milk!
Our older foster son wanted to know if we could have "pink milk" everyday! There's just something about color that makes it taste better? *grin*
We had vegetarian "beef" stew for dinner, with home-made herb bread and red berry strudel for dessert. Here's a photo of my stew while it was cooking.
It wasn't so pretty by the time it was done, lots of color loss, but BOY did it smell and taste fantastic! I guess all the celery is at the bottom, but it and the rosemary I tossed in gave another color to the whole pot.
I hope everyone had a good day, with not too much snow and lots of love.February 12, 2007
Blog candy!
Nope. Not FROM me...FOR me! I actually WON some blog candy! I mean, I never win anything. Ever. And boy has my luck been down lately. *shaking head*
I found out that I won an incredible piece of art by Sarah Fishburn. She is an amazing artist. I go to her blog just to drool! It's a collaged heart pendant and she actually sells them at Whole Foods! I know you want to see them, so check them out here. I can't wait till it arrives! I was thinking I might give it away as a gift, but I've changed my mind (without even having seen it), and intend to wear it every day to remind myself to create SOME form of art always.
The second blog candy I won was from Craft Critique. This place is really great. It's like the consumer reports of the crafting world. No advertising, just honest, unsolicited advice on crafting tools, products, and supplies. I read their article on the Crop-a-dile today and it was just what I was looking for! I'm not sure what I won yet...it was a secret. But it's a whole BOX full of goodies! Read about it here, and bookmark this blog, because you will return often to read the reviews!
This whole winning thing had done wonders for my mood. I just might have to offer some blog candy of my own! Stay tuned to see...*wink*
Asian ATC
Because I'm not posting a new card today, I thought I'd show you an ATC (Artist Trading Card) that I made last year sometime for a swap. It quite appropriately corresponds well with my earlier posted recipe! It's a mish-mash of ephemera and royalty-free images that I've collected over the years. The branch and writing were stamped and then the edge was painstakingly cut out. I applied the Geisha image on top of a red circular cut-out, and then layered everything on top of a colorful background. I added a small silver skeleton leaf and a vellum flower with a small pearl center that I tore off a photo corner set I'd had lying around forever, and then used my corner rounder punch on the corners. I like inspecting older work...it makes me realize how far I've come in design know-how. If I were to re-do this ATC, a lot of changes would be made!
Hiatus
WOW, has it really been 2 days since I posted anything?! I did make a few cards this weekend, but I can't post them until after St. Valentine's day because I know a few people check my blog who might be receiving one. Our 7 year old foster son said it was his new favorite food and asked me if he could have it for breakfast too! My husband agreed that it was better than the Vegetable Fried Rice we occasionally get from the chinese restaurant. I had to disagree. There is just something about american chinese restaurant food that is impossible to re-create in my home kitchen...although I will keep trying!
I can. however, post a quick recipe. We had Vegetable Fried Rice this weekend that was super yummy and quite easy to make. I heated some peanut and toasted sesame oil in my WOK, tossed in some chopped green scallions (white AND green parts), some minced garlic and about 1/2 tablespoon of minced fresh ginger. Then I tossed in 1/2 cup of finely diced carrots and celery and cooked 2 minutes with the lid on. One minute later I threw in 2 beaten eggs and scrambled them quickly. Then I added 3 cups of COLD, cooked rice, and 3 Tablespoons of Tamari (soy sauce), and a dash of vegetarian stir fry sauce. I mixed this all up together and threw in 1 cup of baby peas, thawed, a large handful of shredded napa cabbage and 1 cup of diced vegetarian pork. I only let it cook so that the flavors could mingle well, about 2 more minutes, before I removed it from the heat and served it up. A sprinkle of toasted sesame seeds on top made it perfect (although I forgot to add them before I took the photo). I also included some extra vegetarian pork on the side, and placed a small dish of chopped green scallion tops and one of duck sauce on the table for serving.
February 09, 2007
Birthday
Just a quick post...my schedule is CRAZY today!
I made this fast BD card for my SIL last week. Was having a total mind blank and then the idea just popped into my head! She's mom to a toddler and twin babies under a year so I went with cool, calming colors. This photo makes the colors look "off", though they aren't in person. The olive leaves match the button exactly in real life.
PP came from the "OLD WORLD" Stack from Joanns, stamps are SU "Best Blossoms" and sentiment is unknown. Ribbon is Offray, button is SEI, CS is Bazzill and SU, ink is Ranger and Hero Arts. In retrospect, I wish I had used pop dots under the flower to lift it up a bit, and add more depth to the card.
February 08, 2007
Paint can
I went to a family baby shower late last year, and because I'd been wanting to try it, I decided to alter a paint can and fill it with necessary items for the mom-to-be. It wasn't hard at all once I decided which papers to use. The problem with that, was color. The couple was having a girl. Seems simple enough, right? Pink is the obvious answer, although I was thinking of something a bit more daring, like shockingly hot pink, or maybe a salmon color instead of plain old baby pink. But, the father-to-be (my nephew), vehemently expressed his dislike for all things pink, and expressly forbade anyone from his side of the family to give them any pink stuff.
So...I went with orange, yellow and blue with touches of dark red.
It turned out to be a big hit at the shower, with several folks "pre-ordering" one from me for various other events!
I used PP from Chatterbox, red chipboard letters by MM, Prima flowers, various ribbons and ric rac from my stash, embellishments by Doodlebug, $ Tree, MM, and Joanns. Bazzill chipboard flower. I adhered the paper to the can using Mod Podge and it worked well.
I filled the can with: Aveno baby wash, lotion, and diaper rash cream, a pack of white onsies, an accessories kit in a teal bag that had nail clippers, a thermometer, bulbous nose thingie, medicine spoon, etc., a 4 pack of organic cotton baby washcloths, a bottle brush, a pack of organic cotton baby socks, a binky clip thingie, and a mini comp book journal decorated to match the can for the mom's purse.
I still have a few empty paint cans left from my buying spree last year, and I think I will alter one for our oldest foster son's teacher.
February 07, 2007
Wild animals
I made this card for a co-worker last night, whose DIL is expecting any day now.
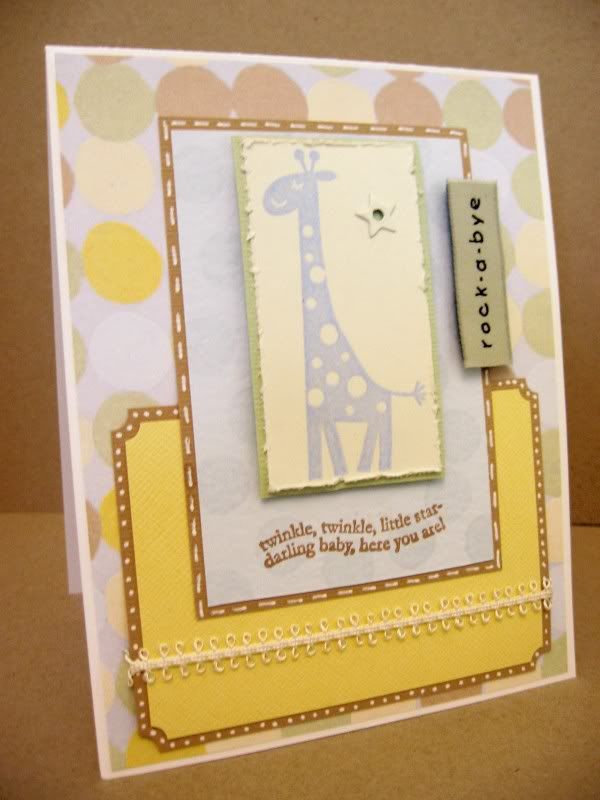
All stamps are SU. I just received the"Wild About You" set in the mail and I'm already in love! All CS is Bazzill, PP is unknown (from my stash), trim and star eyelet are also unknown, small fabric tag came from the $ store, and ink is Hero Arts versacolor pigment cube, and Versamagic chalk ink.
After embossing the giraffe, I distressed the edges of the ivory CS, matted it with pale green, and adhered it to the blue with pop dots from the $ store. I wanted to bring out the dot pattern from the BG paper, so I cut my own small circle out of some scraps of rubber, and used versamark to add circles to the light blue CS. The photos makes it hard to see, but they are more visable in real life.
Not having the ticket corner punch, I used a large hole punch to cut the corners of the bottom two CS mats, and doodled with my white gel pen on the creamy brown CS. The space at the bottom of the yellow CS is where the baby's name will be, but I didn't want it on for posting here. This card was inspired by this card at SCS.
The next card was made for that same co-worker's grandson!
Again using the SU set "Wild About You" and some SU cardstock (Marigold Morning, Whisper white). Plus some sentiment stamps from Purple Onion Designs. Michelle makes AWESOME stamps over there! I have quite a collection of her stuff.
PP is Chatterbox, rest of CS is unknown (scraps from my stash). Ink is Impress, Ranger archival and SU, and eyelets and number rub-on are MM.
I stamped the animal images on whisper white CS, cut them out by hand and used my corner rounder punch on them before matting them with colorful scraps that I also corner rounded. They are adhered using $ store pop dots to the PP. I popped out the lion's mane and the elephant's ear, used liquied applique on the giraffe's spots and will put google eyes on the alligator (the ones I had were too big). I doodled using my trusty black marker from ZIG, and my white gel pen. I hope these bright colors and fun animals appeal to her grandson!
This card was loosly inspired by this one at SCS.
All stamps are SU. I just received the"Wild About You" set in the mail and I'm already in love! All CS is Bazzill, PP is unknown (from my stash), trim and star eyelet are also unknown, small fabric tag came from the $ store, and ink is Hero Arts versacolor pigment cube, and Versamagic chalk ink.
After embossing the giraffe, I distressed the edges of the ivory CS, matted it with pale green, and adhered it to the blue with pop dots from the $ store. I wanted to bring out the dot pattern from the BG paper, so I cut my own small circle out of some scraps of rubber, and used versamark to add circles to the light blue CS. The photos makes it hard to see, but they are more visable in real life.
Not having the ticket corner punch, I used a large hole punch to cut the corners of the bottom two CS mats, and doodled with my white gel pen on the creamy brown CS. The space at the bottom of the yellow CS is where the baby's name will be, but I didn't want it on for posting here. This card was inspired by this card at SCS.
The next card was made for that same co-worker's grandson!
Again using the SU set "Wild About You" and some SU cardstock (Marigold Morning, Whisper white). Plus some sentiment stamps from Purple Onion Designs. Michelle makes AWESOME stamps over there! I have quite a collection of her stuff.
PP is Chatterbox, rest of CS is unknown (scraps from my stash). Ink is Impress, Ranger archival and SU, and eyelets and number rub-on are MM.
I stamped the animal images on whisper white CS, cut them out by hand and used my corner rounder punch on them before matting them with colorful scraps that I also corner rounded. They are adhered using $ store pop dots to the PP. I popped out the lion's mane and the elephant's ear, used liquied applique on the giraffe's spots and will put google eyes on the alligator (the ones I had were too big). I doodled using my trusty black marker from ZIG, and my white gel pen. I hope these bright colors and fun animals appeal to her grandson!
This card was loosly inspired by this one at SCS.
Calzones
Dinner last night was an unplanned, impromptu creation. I had been thawing some wholewheat pizza dough in the fridge, and I guess I took it out too soon. It started to rise inside the plastic bag, unbeknownst to me. So when I got home from work, there was this ENORMOUS mass of sticky dough sitting on the counter, all stuck to the bag and not at all usable for what I wanted. So I thought I'd make calzones out of it, because, let's face it, they are nothing to look at, even when they're done professionally!
I sauted some broccoli, mushrooms and chopped red peppers in olive oil with a touch of minced garlic. Mixed it together in a bowl with a small container of ricotta cheese, some shredded mozzarella, and 1/2 cup of shaved parmesan. I stirred in a fair amount of freshly ground pepper and filled the dough with this mixture, being sure to pull over and seal the edges by twisting and pressing with fork tines.
As you can see, I didn't do the best job of sealing it! But the amount of dough and mixture made two huge calzones, and we used our own marinara sauce for dip. I might do this again using broccoli and vegetarian sausage, or maybe spinach and mushrooms. We all thought it was delicious!
February 06, 2007
So after the previous post, I figure we need something a bit more uplifting! Here is another St. Valentine's day card that I shamelessly cased from SCS.
I have had this heart stamp set for quite awhile and never used it so I decided to look there to see some samples using it. I fell in love with one posted by a user called "mytime". I asked her permission to re-create it, albeit a bit differently, and she said yes! Her work is just stunning--you should check it out here.
I stamped the hearts using mostly pigment ink by Colorbox and Versamagic. The black is Ranger archival ink--my favorite black ink for everyday stamping. Black, red and white CS is from SU, pink CS is Bazzill. Heart brads are from Joanns and ribbon is Offray. The word was stamped with typewriter alphabet stamps using a Palette stamp & stick glue pad and silver glitter. Clear embossing powder used on the bottom red heart is Joanns too. I used my old scalloped scissors to cut the white CS edge, and mounted the heart piece with pop dots from the $ store.
This card is going out to my best friend Mary for St. Valentine's day.
Good Grief
Last night on the way home from DayCare with the kids, another car turns directly into us, smashing us on the passenger side and driving us accross the road into the ditch on the other side of the road. We're all ok, not hurt at all, thank the powers that be. Let me tell you that my adrenaline was up and I was angry though. I was upset because the other vehicle hit us right where the youngest was in his car seat, and the entire time it was happening all I could think was, "Please don't let the baby be hurt."
To top it all off, the other driver was driving an un-insured, un-registered vehicle with ILLEGAL plates on it! So because he had no insurance, WE have to pay an out-of-pocket deductible through our insurance company. Hopefully the other driver will re-imburse us. *fingers crossed*
So we sat in the snow bank in the car for an hour and 20 minutes while the police filled out the accident report and issued the other driver numerous tickets. I had to keep the car running because it was -2 outside and the wind chill made it much worse. The kids were very well behaved although quite hungry, and the toddler (whom we are toilet training) kept saying, "Momma, Potty!" *chuckle* I can laugh about it now, but it wasn't very funny then. He also kept repeating, "SMASH! Not nice!" Because we were in the snow bank, I couldn't get out my door, and because of where we were hit, the passenger side door wouldn't open, so I was stuck, and couldn't really do much.
We fianlly got home(4 blocks away)though the car was barely drivable. My husband took lots of photos so that we can send them to our insurance company. Now the fun begins *rolling eyes*
February 05, 2007
Fun Quiz
You are Apricot |
Soft and sweet, over time you let your provocative nature shine through. You are definitely unconventional, but you don't broadcast it. You offer people a fresh perspective on life - so fresh that it can be shocking! |
sharing paper
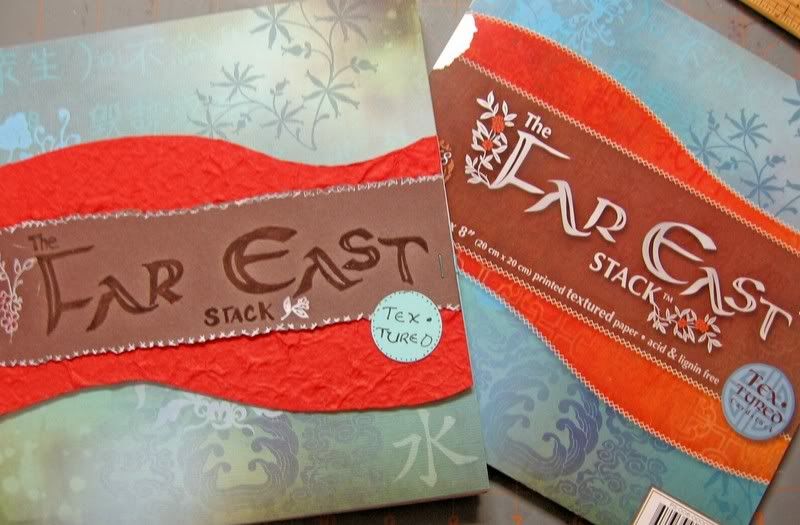
I recently bought an 8x8 stack of textured, patterned CS at my local Joanns. My friend Bobbie mentioned that she really wanted some but didn't want to pay full price, so I used a coupon and bought it for us to share! It came with 2 of each design, so I split it equally with her (except for one pattern which I didn't care for and I gave them both to her), but it looked so forlorn without its cover. Hmmmm. What could I do to make that stack of paper look better?
I know...make another cover!
So I quickly cut a red textured strip of paper, leftover from a customer's wedding invites this past summer and added a torn strip of brown CS on top. The ironic part being that the red textured paper CAME from Thailand where it is handmade! So it really is "Far East." I hand drew the words using a Sakura Glaze pen, and doodled some faux sewing along the edges and a small flower. I stamped a portion of an image from SU's "Artfully Asian" set on the left side of the title in Versamagic white cloud ink, and added a cool caribbean CS circle to finish it off. I stapled ribbons to the sides of the entire piece and then tied them in back to keep this "cover" on the stack. She should be getting this soon--hope she likes it!
Brrrrrrrrr
It is quite cold here in upstate New York this morning. - 1, with a wind chill of -25! School is closed because of the ice on the roads. We live in such a rural area of the valley, the buses need semi-clear roads to gather all the children.
I woke early again and felt like working in my studio, so I popped out this quick tag based on a design I saw in Papercrafts Magazine.
PP by Creative Impulse, yellow CS by Bazzill, SU whisper white and cool caribbean CS, Chalk ink by Colorbox and Versamagic, brads and rub-ons by MM, ribbon by offray.
The original used a sailboat embellishment sticker by Doodlebug, but not having it, I just made my own by cutting some shapes out of CS, and layering them on a circle I stamped with chalk ink. I then punched it out using my Marvy mega circle punch and inked the edges, before adhering it with pop dots. I doodled on the boat a bit using my white gel pen. I have another one in mind using different colors and a duck instead of a sailboat, so if I get to it tonight, I'll post it also.
Sunday breakfast
We were in the mood for something special for Sunday's breakfast so I made these French Breakfast Puffs. The recipe came from Tammy's Recipe Blog, which I LOVE reading! These were super simple and quick to make. Here's the recipe, with a few modifications to the original.
Preheat oven to 350F.
In a medium bowl, sift together:
1 cup unbleached flour
1/2 cup whole wheat pastry flour
1 1/2 teaspoons baking powder
1/4 teaspoon salt
1/4 teaspoon nutmeg
In a separate bowl, cream together:
1/3 cup butter, softened (I use vegan Earth Balance)
1/2 cup sugar
Mix in:
1 egg (I use Ener-G egg replacer)
1/2 cup milk (I used Soy Egg Nog)
Add dry mixture to wet, stirring just until moistened. Don't overmix.
Fill greased, or paper-lined muffin tin with batter. I only filled 10, not 12.
Bake for 20 minutes. Let cool for 2.
In a small bowl, mix together:
1/2 cup sugar
1 teaspoon cinnamon
In another small bowl, melt 6 tablespoons butter.
Dip top of each muffin in melted butter and then in sugar/cinnamon mixture, coating entire top evenly. Devour!
The addition of egg nog instead of milk really made these scruptious. If I was going to use plain soy milk, I would have added a touch of vanilla to enhance the overall flavor.
February 03, 2007
Blue and Brown
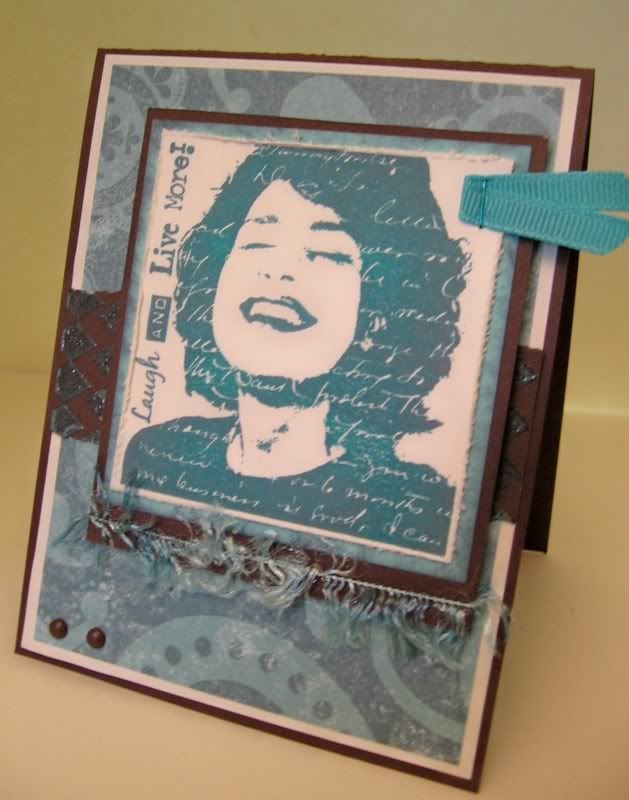
Of course, because I like the pink/brown combo, I adore blue and brown together! This card was made for a swap at Art Happens. The PP is by We R Memory Keepers. The main image stamp is from one of my FAVORITE companies, Paperbag Studios. I really like their images a lot! I didn't have the exact ink color to match the BG paper, so I inked the stamp with a teal color, stamped off onto scratch paper, and then re-inked with a dark grey. It turned out to be the perfect combination to match the paper.
On the small brown strip of CS, I embossed a harlequin design using a stamp from Hero Arts, and pigment ink from Tsukineko. Brown and white CS is SU, teal blue is Bazzill. Brads from Joanns and ribbon from Offray. Fiber is from my stash. Dye ink by Impress.
February 02, 2007
Pink and Brown
I'm relatively new to the idea of CASEing someone's card. C.A.S.E stands for "Copy, and Selectively Edit" although I have heard it put "Copy and steal/share everything". So if you like the design of someone else's card, and you make another one similar, then you have CASEd it!
So, I saw a really nice card here, made for a blogger's only Valentine swap (scroll down) and asked the designer if I could CASE it. When I saw her card, I just pictured a different version of it in my head and wanted to make it myself. She gave me the go-ahead and here is what I came up with.
I've really been liking the pink/brown color scheme lately, and knew that the person I'm sending this to would appreciate it. I used stamps from SU (heart, tag in middle) and TAC (sentiment). PP from Making Memories, ribbon from Offray, sewing, masking, and doodling.
Here is a tag I made last week for our foster son to take to a birthday party he was invited to.
Patterned paper is by Chloe's Closet--afternoon tea. Rub-ons are MM, stamps are varied, ribbon is Offray, flower is unknown, button is SEI. Diamond stickles used along ribbon.
Happy Groundhog's Day!
Because I woke up so early this morning, I decided to make cookies for our 7 year old foster son to take to school. He's been so excited about Groundhog's Day, talking about it all week in fact, so I dug through my cookie cutters and found my GROUNDHOG one!
Here's the recipe I used:
SPICY GROUNDHOG COOKIES
Sift together in a bowl:
1/2 cup whole wheat pastry flour
1/2 teaspoon salt
1/2 teaspoon baking soda
1 teaspoon baking powder
1 teaspoon ground ginger
1 1/2 teaspoons ground cinnamon
In a separate bowl, cream together until fluffy:
1/2 cup butter, softened (I use Earth Balance)
1 cup unbleached cane sugar
Blend in:
1/2 cup molasses (dark)
1 egg yolk (I used Ener-G egg replacer)
Slowly stir flour mixture into the buter/sugar mixture and mix well. Roll dough into a ball, wrap well and chill overnight.
Preheat oven to 350 F. Prepare two baking sheets by lining them with parchment paper or spraying them with non-stick spray. Roll out a small amount of dough at a time and cut out (preferably with a groundhog shaped cutter!). Place on baking sheets and decorate with currents for eyes. Bake 10-12 minutes, let sit on baking sheet for another 5 after removal from oven.
February 01, 2007
Older cards
Just to get things rolling I want to post some of my older cards and other things. It makes me cringe to see them but I know looking at them helps me to maintain a sense of improvement now! You know, like those silly ads from the 80s, "You've come a LONG way, baby!"
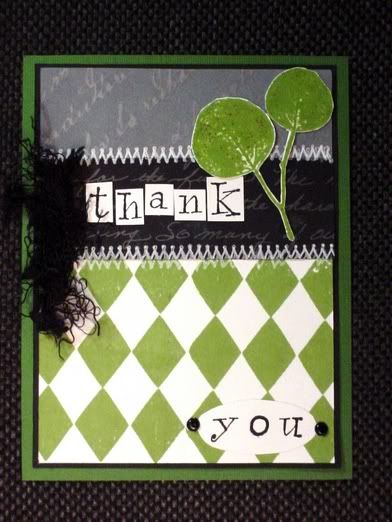
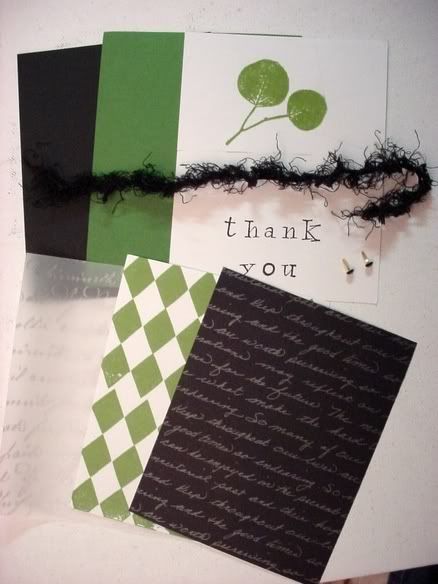
This card was for a supplies challenge at a site I used to frequent. You'd receive the supplies in the mail and have to create a card front with it. It's hard to see the vellum in the photo, it's all the way on the bottom left. I liked the simplicity of these supplies and tried to maintain it when I made the card.
Here's what I came up with:
You can see my miserable attempt at faux sewing! LOL. I have a few stitching stamps and although I love them now, I wasn't so sure about them when I made this card last year.
This next card was for a co-worker a year ago. It was my first use of chipboard ever (the #1) , and I cut it out myself using my craft knife! The BG is embossed with Judikins white diamonds EP, and the cut out wagon is adhered with pop-dots.
I made it so the wagon handle could move by attaching it with a simple mini brad. I also used my white gel pen to draw the rings on the button wheels. I doodled in black around the sentiment rectangles to make them pop.
Next up are some ATCs (Artist Trading Cards) that I made for a swap on Artchix last year. I had a lot of fun using material and actually sewing it to the BGs that I created (no faux stitching here!).
Here are a few up close. Please excuse the poor photo quality--I had a really terrible old Mavica digital camera back then.
The last thing I'm going to share is a card I made for a little contest at a stamping convention last year. It didn't win, but I was pleased with it anyway. I love using alcohol inks and making BGs with them. This card uses lots of different elements, including stamps from SU, Eclectic Omnibus, and RubberStampede. It also uses an image from a collage sheet from ArtChix, just like the above ATCs do.
Well, that's enough nostalgia for today! Thanks for sticking with me this far!